Running Tasks
How to run tasks in Emdash
A task is a unit of work for an agent. Each task gets its own git branch and worktree, keeping changes isolated until you merge.
Creating a Task
- Click Add Task or press
⌘N - Enter a name (or let Emdash auto-generate one)
- Select a provider (Claude Code, Codex, Qwen, etc.)
- Click Create
The agent spawns in a terminal and starts working.
Worktrees
By default, each task creates a git worktree—a separate copy of your codebase on its own branch. This keeps agent changes isolated from your main branch and other tasks.
Worktrees are created in a sibling worktrees/ directory outside your repo.
You can disable worktrees to work directly on your current branch. A warning appears since changes won't be isolated.
Multi-Agent Mode
Run multiple agents in parallel on the same problem:
- Select multiple providers (e.g., Claude Code + Codex)
- Or run the same provider multiple times (e.g., 3× Claude Code)
Each agent gets its own worktree. Compare approaches and pick the best result. See Best of N.
If tasks start local servers, use EMDASH_PORT in your Project config script fields to avoid port collisions between parallel tasks. See Project Configuration.
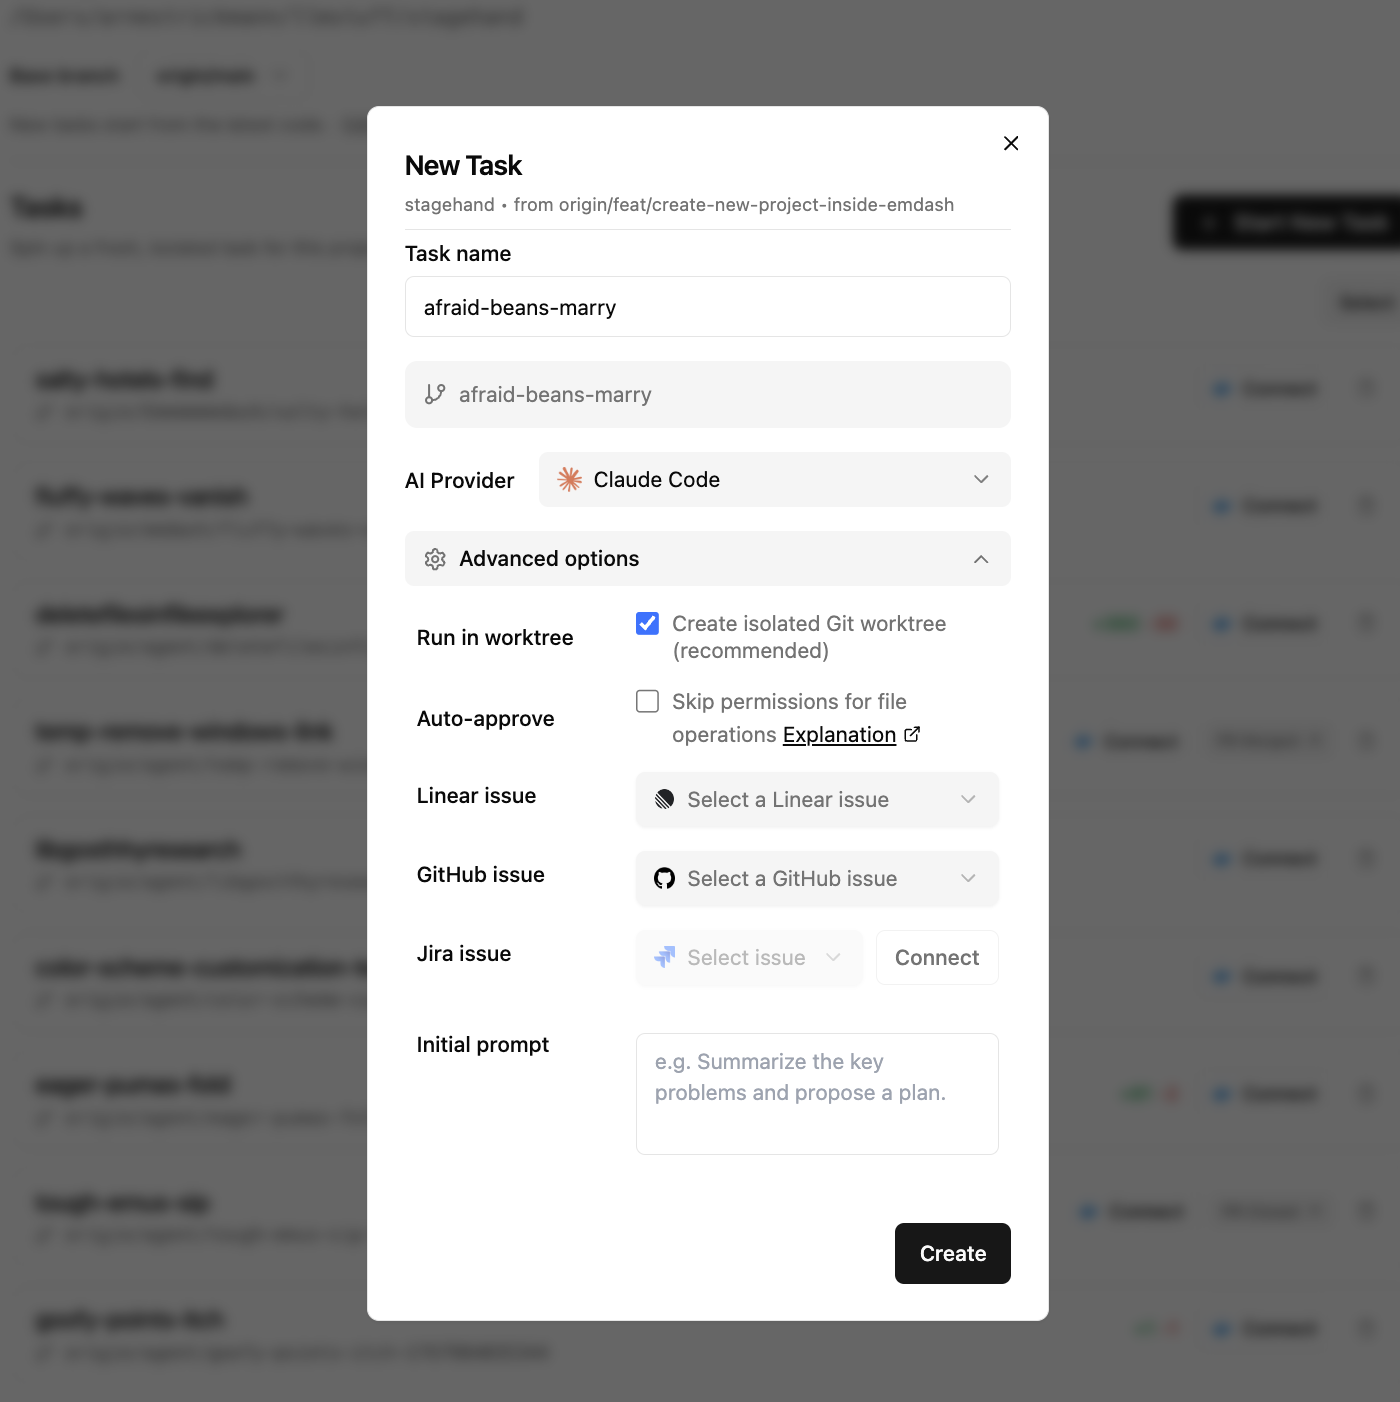
Advanced Options
Click Advanced Options when creating a task to access:
- Auto-approve: Skip permission prompts for file operations (if provider supports it)
- Initial prompt: Give the agent starting instructions
- Link an issue: Attach a Linear, Jira, or GitHub issue (see Passing Issues)
After Starting
Once a task starts:
- A new branch is created and pushed to your remote
- The agent spawns in the terminal
- Chat with the agent or let your initial prompt guide it
Terminal state saves automatically. Close and reopen Emdash, and agents resume where they left off.